This post may contain affiliate links. As an Amazon Associate, I may earn commissions from qualifying purchases, at no additional cost to you. Thank you for supporting my blog and helping me continue to share gluten-free recipes and tips!
After successfully bringing my gluten-free sourdough starter to life, I was beyond excited to finally bake a loaf of bread that actually worked — soft inside, golden crust outside, and completely gluten-free.
I based my recipe on Joanna Overly’s Gluten-Free Sourdough Bread but made a few changes to fit my ingredients and schedule. I used Namaste Foods Gluten Free Organic Perfect Flour Blend, filtered water, Celtic sea salt, and olive oil. And instead of an overnight proof, I proofed mine for just two hours — and it turned out beautifully!
🍞 Ingredients
- 2 cups active Gluten-Free Sourdough Starter (from my previous post)
- 2 ½ cups Namaste Foods Gluten Free Organic Perfect Flour Blend
- 1 ¼ cups filtered water (room temperature)
- 1 ½ tsp Celtic Sea Salt
- 1 tbsp olive oil
Optional: a little extra flour for dusting the top before baking.
🥣 Instructions
1. Mix the Dough
In a large mixing bowl, combine your active gluten-free sourdough starter, filtered water, and olive oil. Stir until smooth using your Skinny Spurtle — it’s perfect for mixing without scratching the bowl.
Gradually add in the Namaste flour blend and Celtic sea salt, stirring until the dough thickens. It should have a sticky but firm consistency — thicker than pancake batter but not as stiff as traditional bread dough.
2. Transfer and Shape
I used a floured Banneton Bread Proofing Basket for my dough. Once it was shaped, I placed it inside and covered it loosely. Since my oven has a proofing setting, I used that to keep the temperature warm and steady — it worked perfectly!
3. Proof
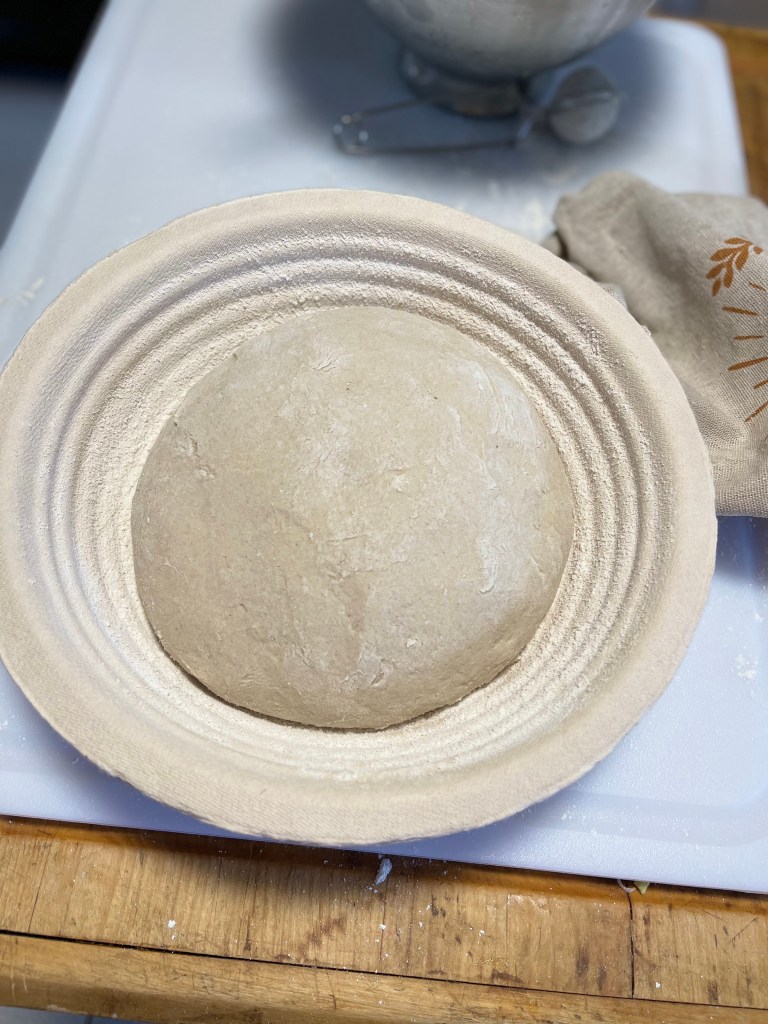
I proofed my dough for 2 hours (not overnight) and it rose beautifully during that time. You don’t need an overnight rise — two hours was perfect for me. The dough should puff slightly and look lighter in texture when it’s ready.
4. Preheat the Oven
After the dough proofs, preheat your oven to 450°F (232°C).
5. Bake
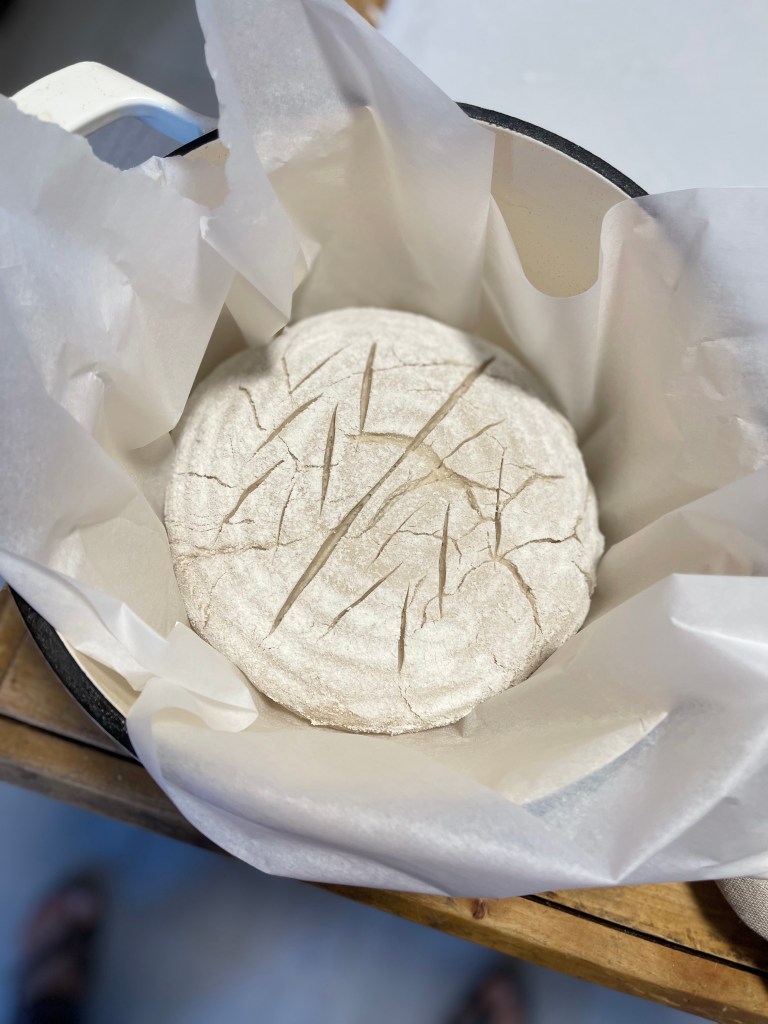
Once your dough has proofed, gently place it in the oven. I used a dutch oven with a lid to bake in.
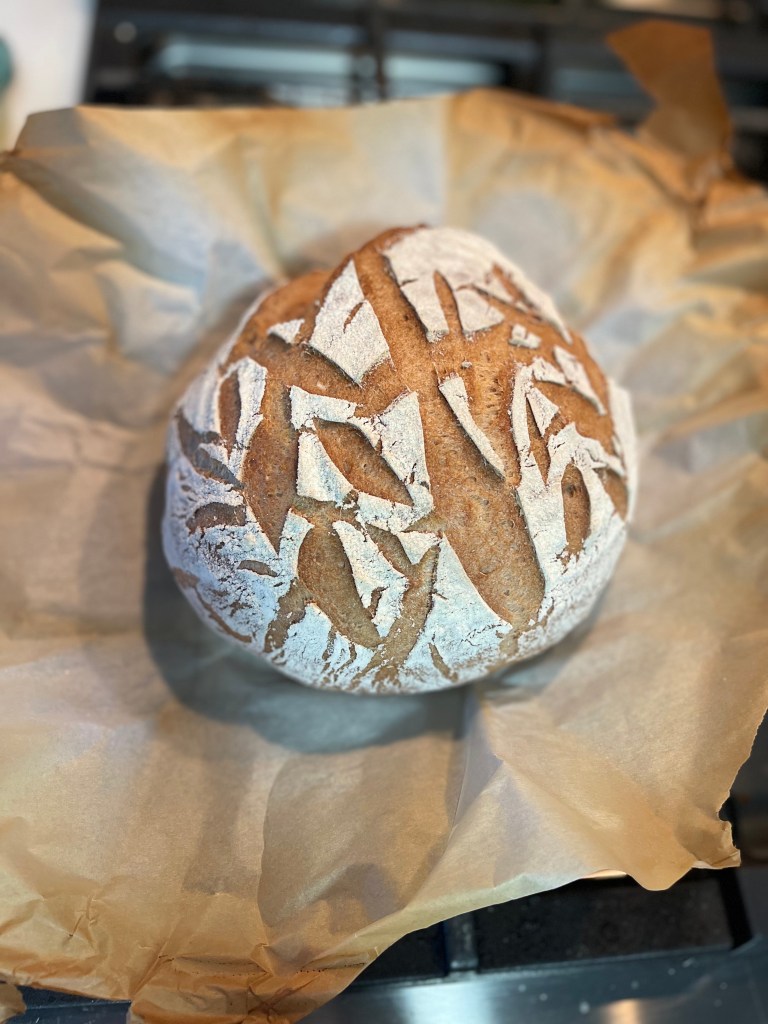
Bake for 50 minutes, or until the top is golden brown and the crust feels firm.
6. Cool Before Slicing
Remove your loaf from the oven and let it cool on a wire rack for at least 2 hours before slicing.
This step is important — gluten-free bread needs time to set so the texture doesn’t get gummy inside.
💫 Michele’s Notes
- Short Proof Success: I skipped the overnight proof and only did 2 hours — and it worked perfectly!
- Namaste Flour: This blend gave the bread a soft texture and mild flavor without any grittiness.
- Filtered Water Matters: Just like with my starter, clean water helped keep the dough active and happy.
- Celtic Sea Salt: Adds depth of flavor and balances the tang from the starter.
- Olive Oil: Keeps the loaf soft and adds a subtle richness.
🧡 Final Thoughts
There’s something deeply satisfying about slicing into a homemade gluten-free sourdough loaf — especially when it rises beautifully and fills the kitchen with that warm, comforting smell.
This recipe was the perfect reward after days of nurturing my starter. The crust had a lovely crunch, the center was soft, and every bite reminded me why baking from scratch is worth it.
If you’ve been hesitant to try gluten-free sourdough, give it a go. With a little patience (and warmth), it’s absolutely possible to bake a loaf that’s both nourishing and delicious.
Baking Notes:
When I baked my first loaf, I only proofed the dough for about 2 hours instead of letting it sit overnight. The bread turned out a little denser than I hoped, which I suspect was because of the shorter proofing time — but the flavor was absolutely wonderful! It had that comforting sourdough tang and a soft texture that paired perfectly with a little olive oil or butter. Next time, I might let it proof longer to see how the crumb develops.
